Wednesday, December 2, 2015

Spines and handles

I am discovering that Joe is spooked by things that work off electricity. He is very wary of the bench saw (I am rather with him on this, because it is a scary beast). But he also believes that orbital sanders are the work of the devil and the router a thing with a malevolent mind of its own. Witchcraft is behind these machines...

"Someone's using a Black and Decker Orbital round here"
We now have all four oars at different stages of completion. The first one has been the guinea pig and has taken about 10 hours to get close to the final shape, but we are confident that what we have learnt along the way will mean that the others are much quicker to produce. The others are following behind nicely.

The trick is to wait until Joe goes off to send smoke signals to people, then get to work with the power tools.

The router helped, so did a sanding disc attached to an angle grinder, as I mentioned before. A lot of wood had to be removed to get from this:


to this:

Nearly there: not bad for a first try? Instruments of the devil in the background.
A big challenge was shaping the central ridge or spine that appears to splice into the spoon from the loom. The answer was much patience and many iterations. Compared to that, the handle is quite straightforward:

Shaping the handle, using a milk bottle top as a template
There is still a huge amount of shaping, sanding and planing, but we can see that the results will be worth it.


Friday, November 27, 2015

Confession time

One of the benefits of our glacial speed in building this thing has been that, at least, each step has been well thought through and planned before we actually finish our tea, get off the sofa and get into action.

"But at my back I always hear
Time’s wingèd chariot hurrying near;
And yonder all before us lie
Deserts of vast eternity."

I had a bit of a rush of blood the other day: we had three of our four oars under way: one at such an advanced stage that, if you left the lights off and squinted, it looked almost finished... The others were taking shape nicely and that only left number four, which needed a bit of adjustment and some joining of pieces before assembly.

I acted in haste. Rashly. Impetuously. Precipitously.(I have to cover the options before Joe has a go at me). The result was, well, er, that I built the damn thing upside down.

How can an oar be built upside down, you may ask? If you are really interested, remember we mentioned that the loom consisted of a box with two sides, a base and a cap? Well, the cap and the base are of different thickness and I, in my headlong dash, had attached the spoon pieces to the loom while it was cap down, not cap up. If we had made the same mistake with them all, it might not have mattered, since, though they might have looked a little strange, at least they'd all be the same.

A base

A cap, up
There was nothing for it, but to remove the spoon pieces and swap them over. However, since I had also merrily hacked away with saw and chisel at the loom, we had to splice in a new section. We just happened to have a spare loom knocking around, which we cut to size. (Ask Joe about where that came from).

The repair insert ready for glueing
All a huge waste of time, though I have to say that the challenge of rectifying the error was great fun.

Now we're back on track...
You can't see the join


Tuesday, November 24, 2015

More spoon thrills

I bet you couldn't wait for the next instalment.

Having roughly shaped the spoon of the oar to the overall curve, we then set about making it less like a pizza peel and more like, well, an oar.

The traditional Thames skiff oar is very slim: when I started rowing (in black and white) that sort of blade was called a toothpick.

Thames skiff blades. Picture courtesy of Hobs.
These were superseded by the Macon oar: a fuller shape. The plans we are basing our design on are close to the latter.

It was a simple job to lay a template over the rough block spoon and  cut away the surplus:


Working across a pair helps to ensure uniformity
Then comes the really hard work of refining that 'blank'. Lots of careful chiselling, planing and sanding:


Taking Shape
We are up to our eyes in sawdust and getting through sheet after sheet of sandpaper. The most effective tool is an angle grinder with a sanding wheel attached. This enables us to shape very quickly and effectively, though it rather stings when you accidentally sand your knuckles with it.

Thursday, November 12, 2015

Spoons

It's all very well trying to be entertaining, but, when it comes down to it, we are building a boat and that's not always going to be funny. There was a vague hope that others would gain inspiration and insight from our experience, but unless you find the story of two non-Completer Finishers, procrastinating their way through a project, uplifting, you are probably out of luck. Buckle up, knuckle down, for a worthy few articles on making oars.

The boat, by the way, has had its 8 coats of varnish on the inside and looks wonderful. We have turned it over and will give the outer hull a final sand and then a last coat. We are debating the addition of a brass rubbing strip down the keel: probably a good idea, given the absence of landing stages on the Waikato.

In the meantime, making the oars is just as satisfying as every other stage of the build. Another learning curve, but another pleasing result. Maybe I am getting ahead of myself, but it's turning out that way....

Having prepared the loom (the shaft of the oar) we glued additional lengths of wood at the spoon end to give the necessary width.
The spoon before shaping
We also added a mahogany tip, for decoration and also strength, but most of this will disappear during the shaping of the spoon.

Most of the resulting block of laminated wood now needs to be removed to look like Michaelangelo (which is our code for "take away everything that doesn't look like the finished article")

A series of horizontal cuts, then chisel away the surplus, was our initial strategy:


This turned out to be very, very hard work, largely because our saw is rubbish and our chisel not too sharp either. Joe had the right idea: he went and wrote emails while I bashed my thumb repeatedly.

It's like uncovering a fossil
Mindless persistence and some heavy work with a sanding disc attached to an angle grinder began to pay off. Since we used different wood types for cap, sides, base and for the width of the spoons, the components are revealed by the shaping process, giving patterns that (we think) add interest.


The mahogany stripes already look nice and we know they will eventually show as a rich glossy brown, contrasting well with the paler wood.

Once the face has been shaped, we then roughly cut away the back before careful, detailed shaping to the template.
What does it mean when Joe's Welcome Mat is inside pointing the way out? 
At a late stage in the game, we remembered that we had a much better option: we have a router, which will make easy work of the basic shaping. As long as we are careful...

Wednesday, November 11, 2015

Up the creek

I have to admit that the problem of the oars has weighed on my mind for some time: the closer the boat itself got to completion, the more I sank into gloom as my desire to do it properly collided with my lack of understanding of how to get there. As so often happens, actually getting stuck in relieved the pressure and, at the time of writing, we are well on the way to producing the oars.

Luckily, Joe stumbled upon this Canadian chap, who provides detailed guidance and a set of plans, which includes templates to limit our cockups to an acceptable margin. We hope.

If you are reading this because you want to build some oars, god help you... this isn't the place for detailed guidance, but our next few blogs will aim to give something of an overview which might help your planning, or avoidance of mistakes.

It's conceptually very simple: the oar is a long box made up of a base, sides and a cap. The sides are subtly tapered along the entire length towards each end, to give the correct shape, and the ends are filled to make a solid handle and spoon. Parallel sides are added to complete the spoon, or blade. The base and cap will then be shaped to give a rounded profile and the spoon cut, planed, sanded to give the traditional curved shape.

Here is our first pair waiting for the cap to be added:
The spoon end
The blocks in place to make the handles
It's important to get the sides as mirror images: small discrepancies  can be adjusted with a plane or sanding block, but getting it right from the outset is preferable, otherwise you may be swallowing a fly....

Note that the wood of the base and cap is very unlikely to be dead straight, so it's best to mark your own centre line and use that as a reference for shaping.

We then stuck the caps on and applied as much weight along the length as possible:


When the glue had set, we unclamped everything: there were some small gaps between the sides and the cap, which we concluded were due to the surfaces of the wood not being perfectly flat, but a bit of extra glue will take care of those.

We then planed off the excess where the cap and base overlapped the sides. After much checking to ensure that the handle end and the spoon were in alignment, we glued and clamped the laminates to widen the spoon. We have gone for a design which will give us a couple of mahogany stripes on the spoon: a sort of design twiddle to echo our breasthook and rudder yoke strips (see earlier blogs).

Oar laminates clamped
The spoon ready for shaping

You can discern the shape of the loom, which follows the lines determined by the sides of the oar.

Next comes the real challenge: shaping the spoons. One is easy enough, but four that match is tricky.


Wednesday, November 4, 2015

18 Years and not a word!

For those of you who have any culture, you will be aware of the scene in The Life of Brian where Brian, fleeing his adoring crowd, jumps into a hole landing on Simon the Holy man's foot. Simon cries out, breaking his 18 year vow of silence. He's understandably unhappy. We had a similar moment yesterday.

Oh my foot!!

First a bit of background, five years ago we decided to get into the Guinness book of world records (We're actually both already in it, more about that later)  by being the first people to row the Waikato River in a boat that we've built ourselves. Disregarding our fatuous attempts at fame and fortune, we've had an unspoken agreement that we would avoid outside help and do all the work ourselves. We've talked about it.

So, yesterday, Jenny the lodger, walks into the garage and asks what the spokeshave does, so without thinking, I demonstrate on the loom and turn back to hacking at the spoon. The next thing I know Chris calls out "Oh my foot!" or words to that effect. Jenny had started shaping the loom for us. 5 years of hard work undone, we've had help. To be honest, my first thought was sod it, she might as well finish it now. Chris was more creative, he suggested that Jenny join the team and row us down the Waikato, or maybe spend some time in the coxswains seat. We had some more extreme ideas, including disposing of Jenny under the patio. Jenny was quite keen to avoid this and has agreed to join the support team.

Jenny "Spokeshaves"
So, the floodgates are open, carpenters out there with some time on their hands, feel free to pop round, spokeshave in hand, and finish the boat and oars.

Note to Norris McWhirter : The oars aren't strictly the boat, so the record will stand.

Wednesday, October 14, 2015

Oarsome or better still, some oars

I am very fond of New Zealand, the scenery is spectacular, the people, when not chuckling over the sporting failures of the mother country, tend to be very friendly. However, there is one thing that particularly irritates me, it's the over and inappropriate use of the word "awesome".

A typical example would be at the pub ordering a bowl of chips.


Me "Can I have a portion of chips please"
Barman "You mean a bag of chips ?"
Me "Sorry, can I have a portion of fries please" 
Barman "Sure, would you like aioli and ketchup?"
Me "Yes please"
Barman "Awesome!"

Now, I've checked the dictionary and awesome means to fill with awe, particularly awe inspiring, whereas aioli is a sort of garlic mayonnaise sauce. 

For clarification.

Something flipping awesome
Some Mayonnaise

Some oars. While not watching paint dry, we've decided to kill time by building the oars. The process involves making a hollow box, with a solid bit at both ends, widening the spoon end and then using a series of templates, cut away all the bits that don't look like a spoon. This will require some actual woodworking skill and precision. The dimensions of our oars, in terms of length, overlap and inboard are governed by the width of the boat at either seat, which means we're having to custom build the looms. However, making the spoons is going to to require some outside help, we've found this at angus rowboats. Their instructions are very clear and the spoon templates will be essential.

Not a spoon
Another couple of photos for clarity. 


Spoons


Anyway, here are some photos of the actual oars being made, it's been awesome to actually build something for a change.

Obviously before we started building the oars,
we had to build an oar building platform. 


After much measuring, procrastinating and tea,
we start to glue an oar together. 

The spoon end of the oar, you might be able to make out the shape of the oar from this angle.

Wednesday, September 30, 2015

25-28 and the return of Edward The Compressor

Joe, like many Englishmen, loves almost all sports. Also, like many Englishmen, disappointment is tempered by the fact that there's always something else to look forward to: the failure at the Rounders World Cup is swiftly followed by the Ashes series and a feeling of redemption. I am enjoying a brief period of pure joy, ignoring the looming threat of Fiji and the increasing likelihood that Warren will be on the phone asking me to get the Dubbin on my boots once more.

So, the result at the weekend, instead of creating a tension in our workshop, has been swiftly set aside as Joe focuses on the next thing...er, whatever that might be.* The rules dictate that a certain amount of gloating is required: it's part of the healing process, so I have tried to help as much as possible, but his sunny disposition makes it an unrewarding game.

We are now hurtling towards completion of this project. Phase One, at least: Phase Two will be the row itself, which started as the big thing, with the building of the boat initially seen as a minor hurdle on the way. As the build progressed, the trip down the Waikato receded in our minds...but was never forgotten.

The exciting step forward last week was the declaration that we were ready to begin the varnishing of the inside of the boat. We need to make the seat back for the cox's seat, but everything else is now done, as far as the boat itself is concerned.

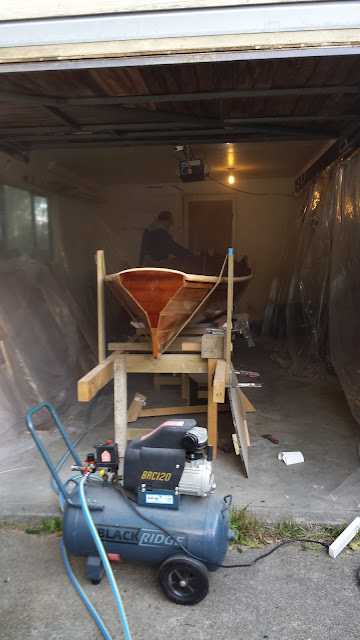
ET's tent has been resurrected, creating a separate spray booth that lets us do other things while each layer of varnish dries. The air is still a bit cold, which means the interval between sprays is more like 2 days (we managed one per day when we did the outer hull), so we have also started on the construction of the oars. With a bit of relearning, Edward the Compressor is functioning and we have completed three layers, spraying with  the confidence of a Welshman in a Twickenham front garden.

It's pretty foggy in there as Joe adds the latest layer, with Edward's noise making post match analysis difficult. Luckily, sign language offers an alternative.

Look forward to some fascinating insight into oar construction in the next few weeks.

* I expect England to beat Australia. If they do, I hope they'll have the good grace to do it by more than 7 points.


Monday, September 14, 2015

Almost Perfect

Chris has this habit of saying "Great, it's almost perfect" when he's working on something. I have discovered that this could mean anything from "It's not ruined" to "It nearly fits". Unfortunately, those who have been reading this blog will know that three years ago, the boat was Almost finished.

A couple of days ago, Chris declared the knees for the seats were almost perfect. Today, while Chris sanded the inside of the boat in preparation for the application of 8 coats of clear varnish, I decided to have a go at the knees with a rasp and various grades of sand paper. I spent about 2 hours on a single knee and ended up with this.

This is an almost finished knee, it just needs another rub down with very fine sandpaper, a few coats of varnish, final fitting to the boat, drilling and mounting.

Oh, and there are three more of the damned things.

Thinking about this, I decided there is a whole vocabulary of terminology I should explain to our faithful followers.


PROCRASTASAURUS (Or, words we use to describe how the boat still isn't finished)

Almost Perfect : It looks vaguely like intended and isn't broken.
Almost Finished : Nowhere near complete, requires hours of effort, and then 8 coats of varnish..
It's not an exact science : It doesn't fit.
Oops : I've chopped an important piece of wood in half by mistake.
When we build our next boat : We worked out how to do it just after we'd done it wrong.
Perfect : Actually pretty good, probably by accident rather than design.
F*cking B*ll&cky C#nt W$nk@r!!!!! : I've hurt my finger.

And lastly, whenever we have a difficult job that could potentially, although probably not, be solved with an expensive power tool, we declare "Selfish git!". This is a reference to my mate Brendan who has emigrated to Australia, taking all of his tools with him. (Not all of them, I still have his jigsaw).

Anyway, when we build our next boat......


Wednesday, September 9, 2015

A Bad Week for Knees

Wales' warm up game at the weekend took a toll, with Rhys Webb, the brilliant scrum half, sustaining the sort of injury that makes you turn away from the screen. If that wasn't bad enough, the same game resulted in a knee injury to Leigh Halfpenny, probably the best goal kicker in the game, which has ruled him out of the World Cup. Given that we went out of the last one because we couldn't land our kicks, the significance of this loss is enormous.

When Joe and I turned our backs on this project to pursue other interests, we had pretty much made all the bits we needed and, crucially, we had sealed everything with epoxy, oil or varnish. Not so our knees....

There are knees everywhere in this boat: basically, L-shaped or triangular fillets that give structural strength to the boat. Those in question were intended to tie the thwarts (seats) to the hull, as in the picture below.

The knees in place on the two nearest thwarts
We made these knees from ply, which, though a fairly mundane composite material, can yield surprising results (regular readers will remember the striking pattern on our ply rudder). Here's one, close up:


The grain on this would have looked wonderful, once a few layers of varnish had been applied.

To our dismay, the damp weather that is a feature of Wellington for much of the winter had been at work while we were elsewhere and our elegant knees have been blighted by a mould that has penetrated beyond the reach of our trusty sandpaper: 

The black stuff
Nothing for it, but to make some more, this time with a solid wood that will match the Fijian Kauri of the thwarts. Fortunately, our high level of acquired skill with the bandsaw made that an easy task... except that this was when the bandsaw blade decided to snap. 

While we search for a replacement, I had a go at making the knees with the other tools: a jigsaw, a hand saw, a belt sander and a sanding block. Not a bad attempt, but the task got an awful lot harder...


I should have made an extra one for Leigh.


Monday, September 7, 2015

Stretcher Bearers

It is fairly obvious that the platforms for our feet are of considerable importance: even in a boat without sliding seats, the only way to connect the power of the oarsman is through the feet. That means that the foot stretchers* (boards) must be strong enough to take the pressure, as well as being at the correct angle to press comfortably. In addition, the stretchers must be adjustable, fore and aft, to accommodate rowers of different height.

We talked about the problem of working with 3 dimensions the other day: Joe helpfully suggested that the main problem was the 4th dimension.
Anyway, ignoring him... the boat tapers along its length, flares outward from keel to gunwale (bottom to top, lubbers) and the foot stretcher has a tilt (known as the rake) to allow the feet to press in a comfortable position. Of course, the supporting cleats (strips of wood) need to be parallel and aligned with the set on the other side.
All this left us with a complex challenge, which I was fully prepared to duck with a crude and botched fix requiring wedges and glue everywhere. Joe shocked me with the elegance and foresight of his solution..and more so with his persistence in getting it right, while I pretended to work on the rudder (occasionally I helped him with things like holding bits in position while he drilled holes, or, more often, dealing with surplus chocolate biscuits, provided by Kim).

We varnished the inside of the hull behind these cleats to ensure a seal before fitting them.
 You can see that there's a little bit of trimming needed, then the cleats will be fixed in place with glue and the screws already pre drilled.  


Joe's mahogany extensions to the stretcher board fit beautifully and give a touch of art deco that echoes the patterns in the bows and on the rudder yoke. 

Add straps for the feet, polish up with fine sandpaper, varnish: beautiful.
 Once we have the second of these in place, we really have done all the hard bits. Except for the oars.


*The term 'stretcher' means a support, brace or connector: so, the stretcher that carried Rhys Webb and a great deal of Welsh optimism off at the weekend has a related meaning. I bet you are glad you asked...

Tuesday, September 1, 2015

The best $2.40 I have ever spent.

For those of you who have been paying attention, you will remember that some time after the dinosaurs we got hung up on the foot stretcher fittings. Fitting the cleats (or sharks fins as they came to be known) required carpentry in three dimensions. A couple more than Chris and I had in our arsenal. Unfortunately, somewhere along the way, captain cockup snuck into the garage and chopped the ends off our foot stretchers. 

So, to complete the complicated three dimensional cleat arrangement, we first needed foot stretchers that fit. I made the visit to City Timber to buy a couple of metres of foot stretcher, only to be told it would be $60 and ready in a couple of days. I explained the problem and it was suggested I scarf a bit of mahogany on the ends and call it a feature. Not wanting to back down in the face of a woody challenge, I agreed. We chose a length of mahogany and the friendly assistant offered it to me for $5. I offered him the contents of my pockets, $2.40, we agreed I'd make up the difference on my next visit.  

Testing our scarph angles on about 35c
worth of Mahogany 
So, we are back to glueing scarf joints,  a bit of a problem when the temperature in the garage is slightly below freezing. I will be sending Chris an electricity bill having run a fan heater overnight. 


The bits of mahogany extending the foot stretcher
That's clingfilm, not ice.


After a morning of sanding, planing, sawing and routing, we now have two foot stretchers that we can offer up to the new fittings. Given it took us two years to solve the problem, you'll thank me for not describing the solution in this post. Trust me, each element has been finely crafted to a precise angle.


The stroke seat foot stretcher slotted into it's cleats can be seen in the last picture. We need to fit the remaining cleats for normal sized rowers, this first setting is for people more my size. We also noted that when we move the foot stretcher into the furthest position, the coxswain will lose his or her toes. Given the effort we put into this part of the boat, I am more inclined to learn toe surgery than to sort this little "feature" out.

Does the protractor on the deck convince you that this was tricky.


Wednesday, August 26, 2015

Excuses, Excuses

Really, we haven't many good ones (excuses for not finishing this boat, that is). Both Joe and I have been heavily involved in coaching at Wellington Rowing Club and we have had all sorts of other demands on our time (the boxed set of Dr. Who springs to mind and Breaking Bad was a must-see).

The real truth is that we were stuck on the problem of the foot stretchers. Pathetic, really, since all it needed was some thought, but this was possibly the trickiest challenge for us, since we both had a fear that the things would break on our first outing.

I am going to let Joe talk about this fascinating subject and to post some photos of bits of wood.


However, despite the smoke screen that the coaching gave us, it wasn't entirely a wasted effort:

Here's Joe, with some medals:


And I managed to get on the podium, too:


My legs have been heavily edited.